Description
The CarbonCRM Workspace is a template that can be applied to any existing, or new, workspace in your monday.com account. Upon adding the CarbonCRM template, all of the CarbonCRM Boards will download with the most up-to-date versions of each board within the workspace you designate.
More information on monday.com workspaces
How to use
If you’re reading this, you have already installed the CarbonCRM Workspace template! If you would ever like to create a new CarbonCRM Workspace or add the CarbonCRM’s boards to a different workspace, complete the following steps.
1.) In the monday navigation menu, go to “Add” right under the Workspace selection dropdown.
2.) Click “Choose from templates” and using the search feature simply input “CarbonCRM” and proceed.
3.) Click to install the CarbonCRM workspace template and then designate where you would like to add the template, either a new or existing workspace.
Recommended Customizations
Change CarbonCRM workspace name and icon:
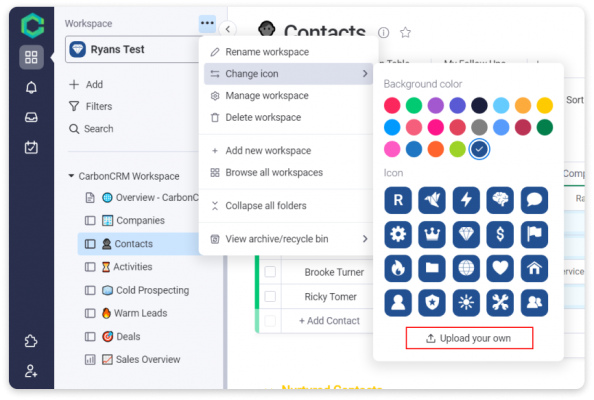
Make the CarbonCRM feel familiar to your team by editing the name of the workspace, and its icon. Additionally, under “Manage workspace” you can edit workspace description, members, and permissions (Enterprise plan needed).
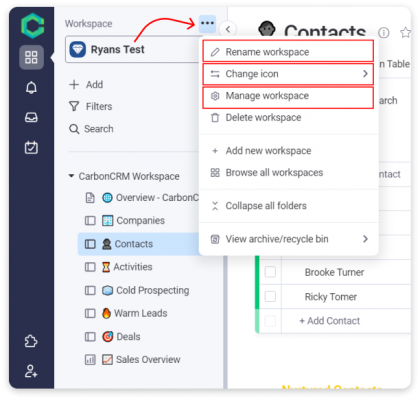
You’ll find you can use monday’s existing customization options or get creative and upload custom icons to make your Workspaces stand out.
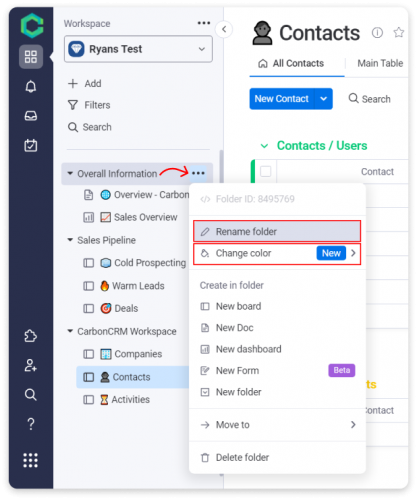
Change structure/layout:
Having something familiar is essential! Feel free to create, remove, or modify folder names and the boards within.
You now also have the freedom to colorize folders to make your system more intuitive.
Additionally, you’re welcome to archive boards that seem unnecessary for your sales or outreach approach.
More global customizations:
You can change the naming conventions of the “items” within every board in your Work OS. In the CarbonCRM, they all correspond to their board names, but depending on your business, industry, or use case for the CarbonCRM; you may want to change them.
Ex.) You’re an event planner and want to use the “Companies” board as your Vendor database. Simply change the item terminology from “Company” to “Vendor”
We’ve identified where the item terminology is present on the board below. Given that this is the board’s foundation, it’s definitely worth customizing.
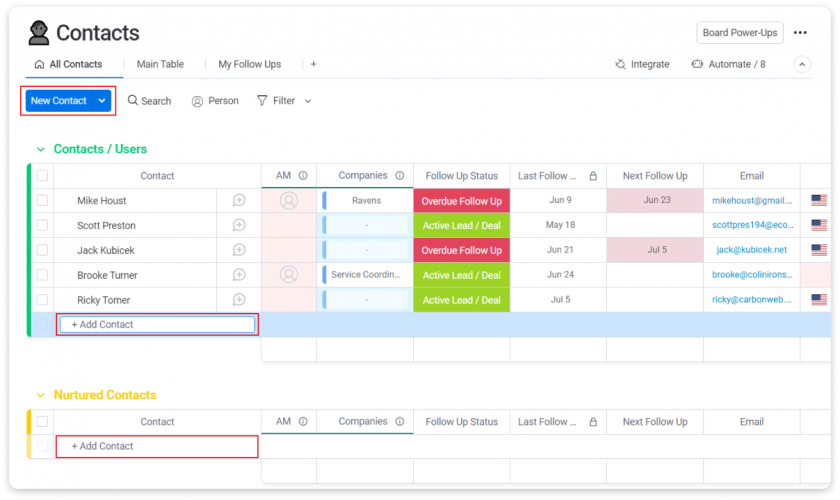
Customize item terminology:
We’ll show you how to find and access the “Change item terminology” feature.
First, click the three dots in the upper right-hand corner of your board.
Next, select “Board settings”, and choose “Change item terminology”.
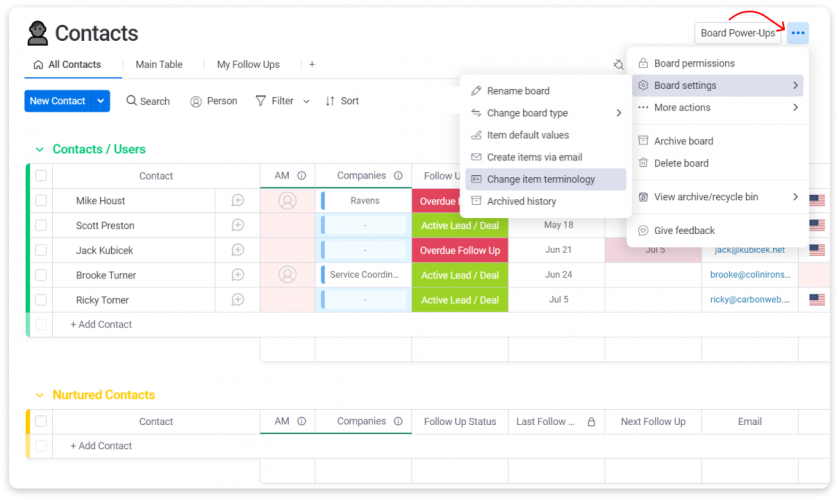
You’ll see several default options you can choose from or replace our custom naming conventions with your own, keeping in mind it should be a singular term.
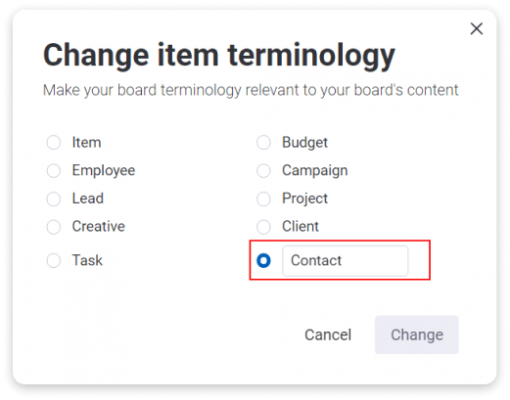
Now you can repeat this process throughout CarbonCRM and more broadly your entire Work OS!